
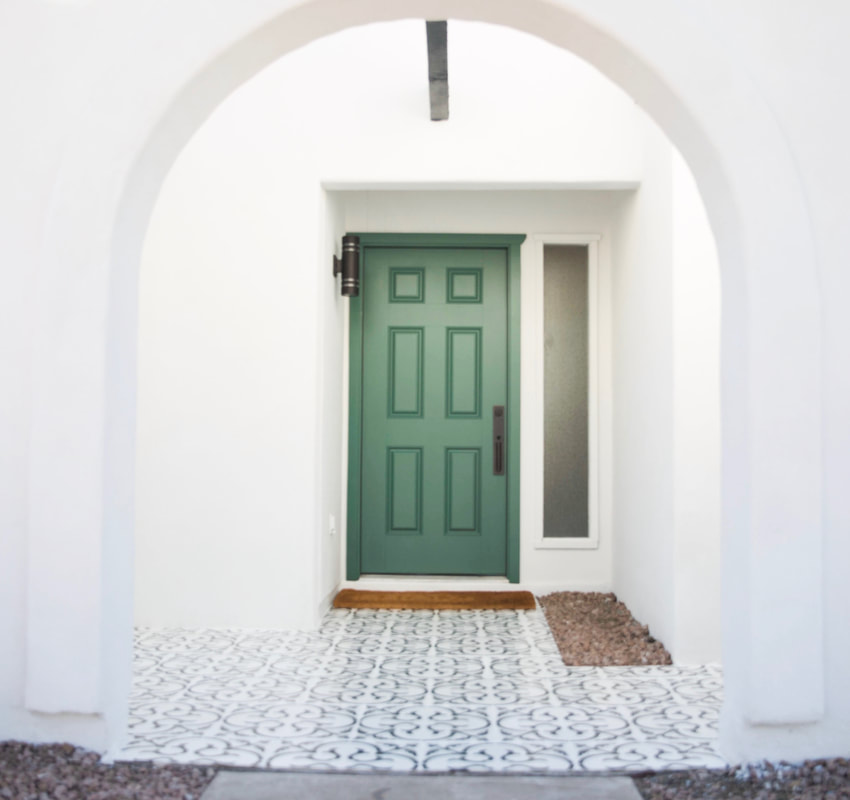
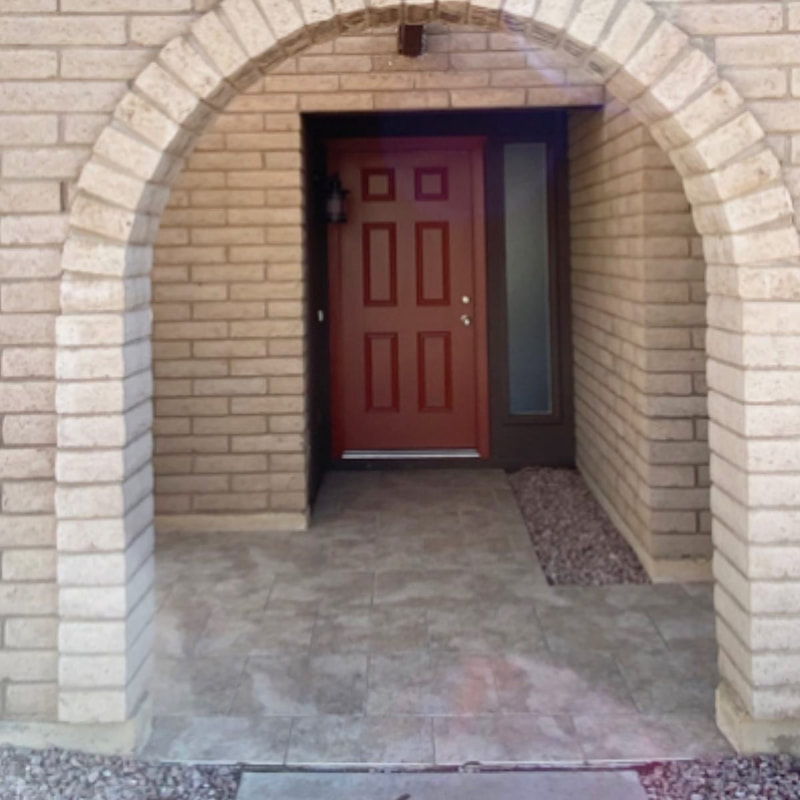
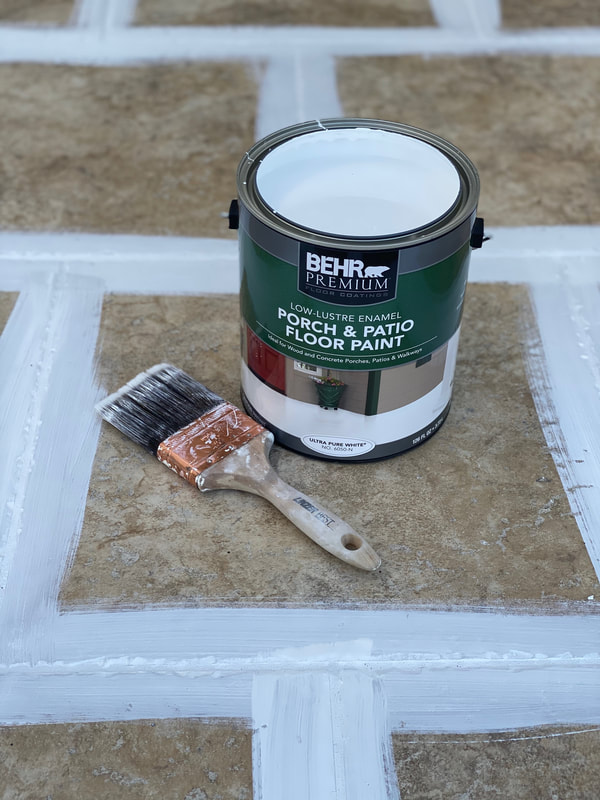
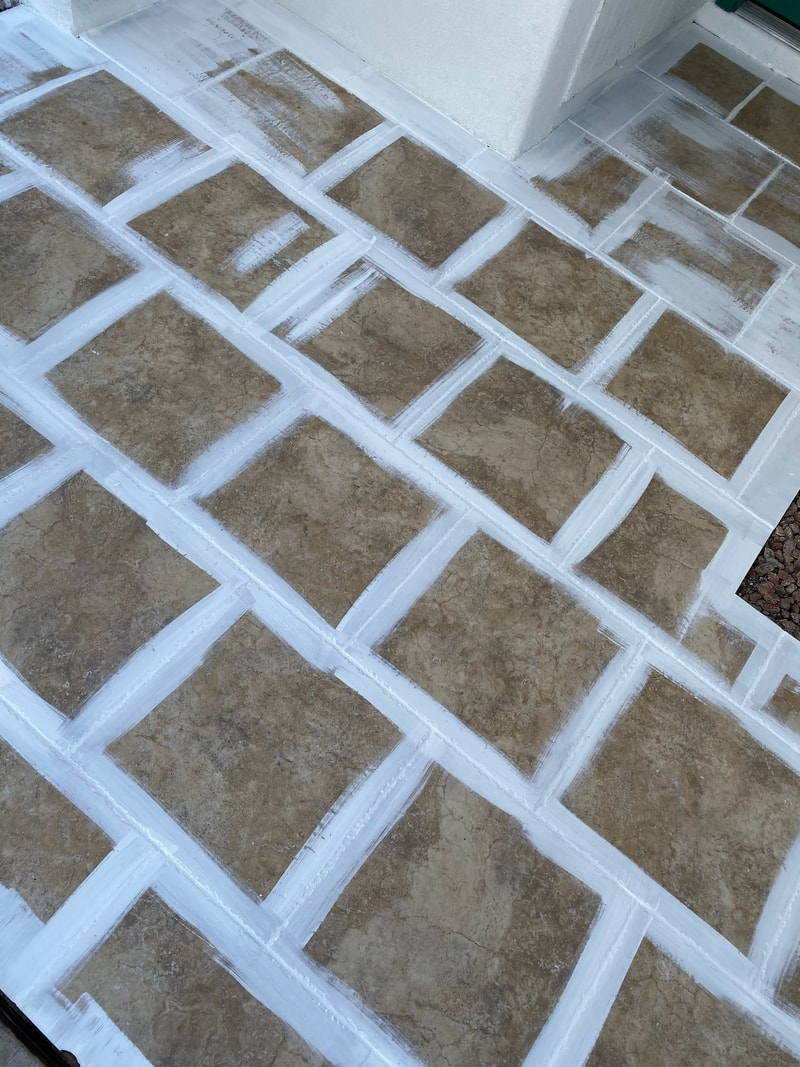
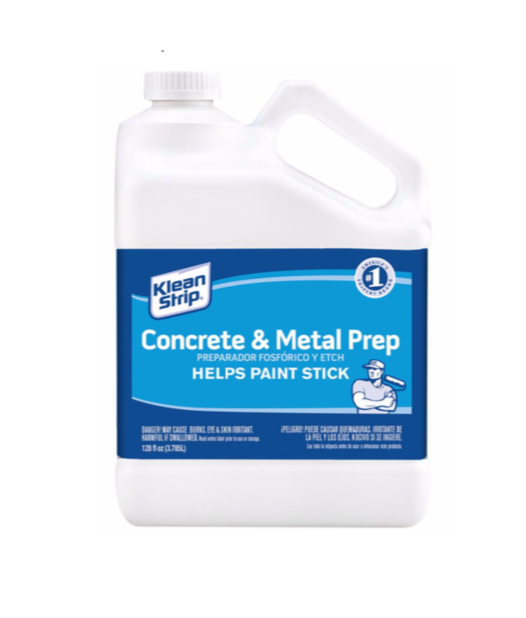
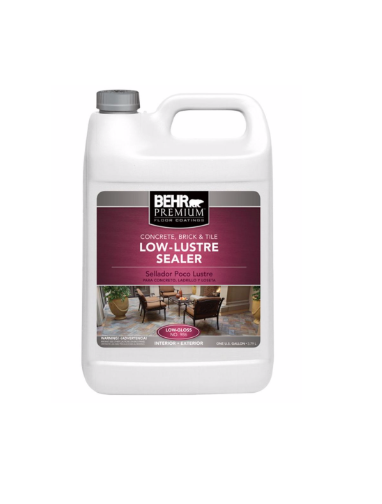
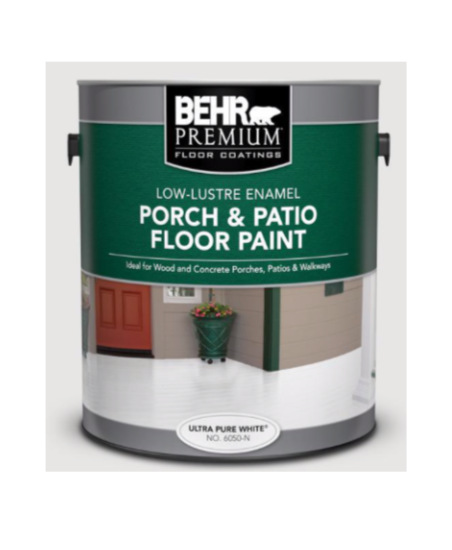
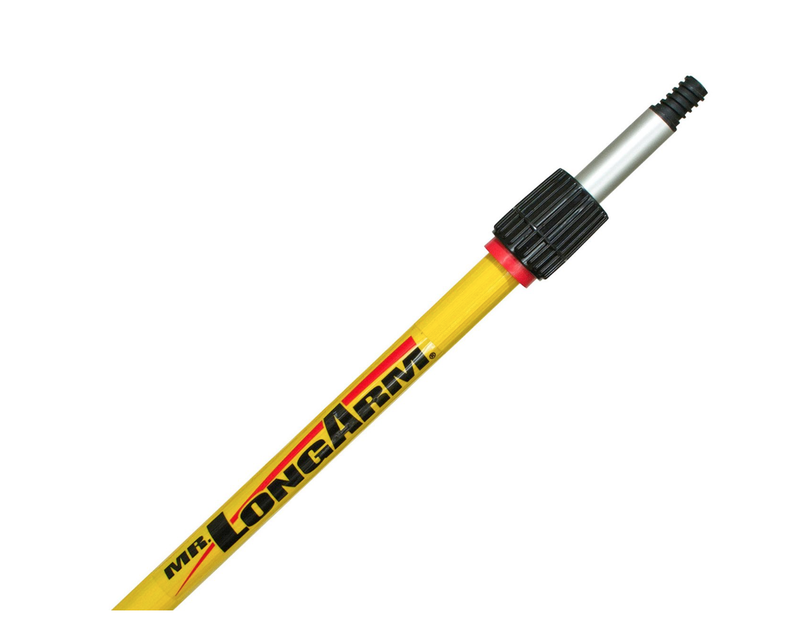
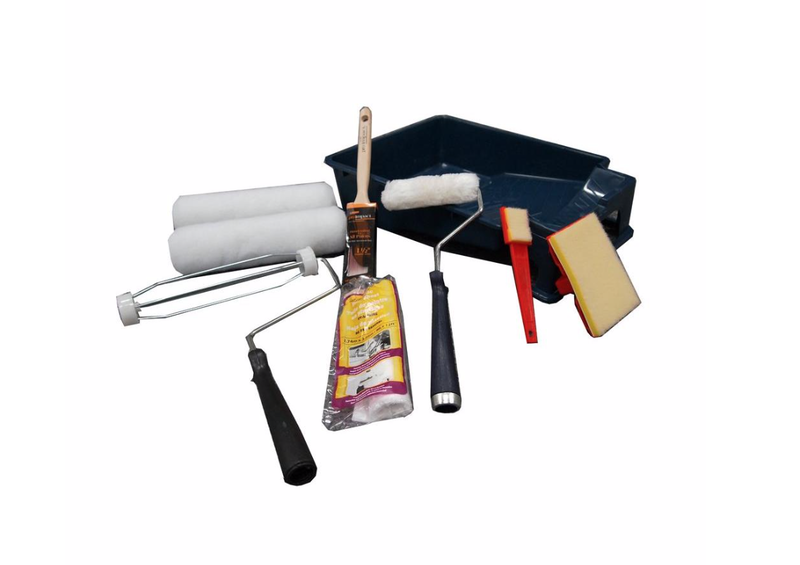
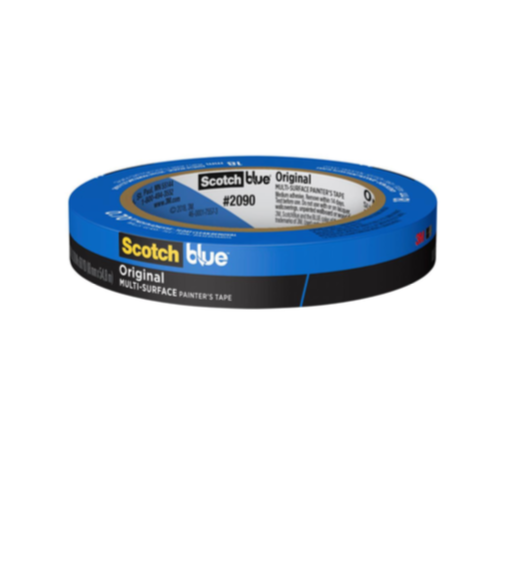
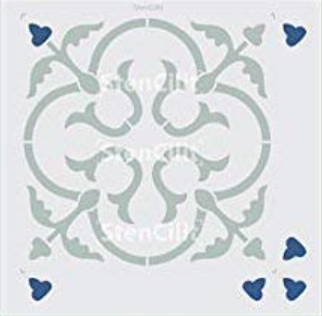
 In a world of muted colors and clean, bright white spaces, we aren't afraid of a little boldness. This easy DIY tile stencil project was not only so satisfying to see come to life, but it gave the entry way the POP it needed! Follow along as we break down each step for you to tackle this proejct on your own! 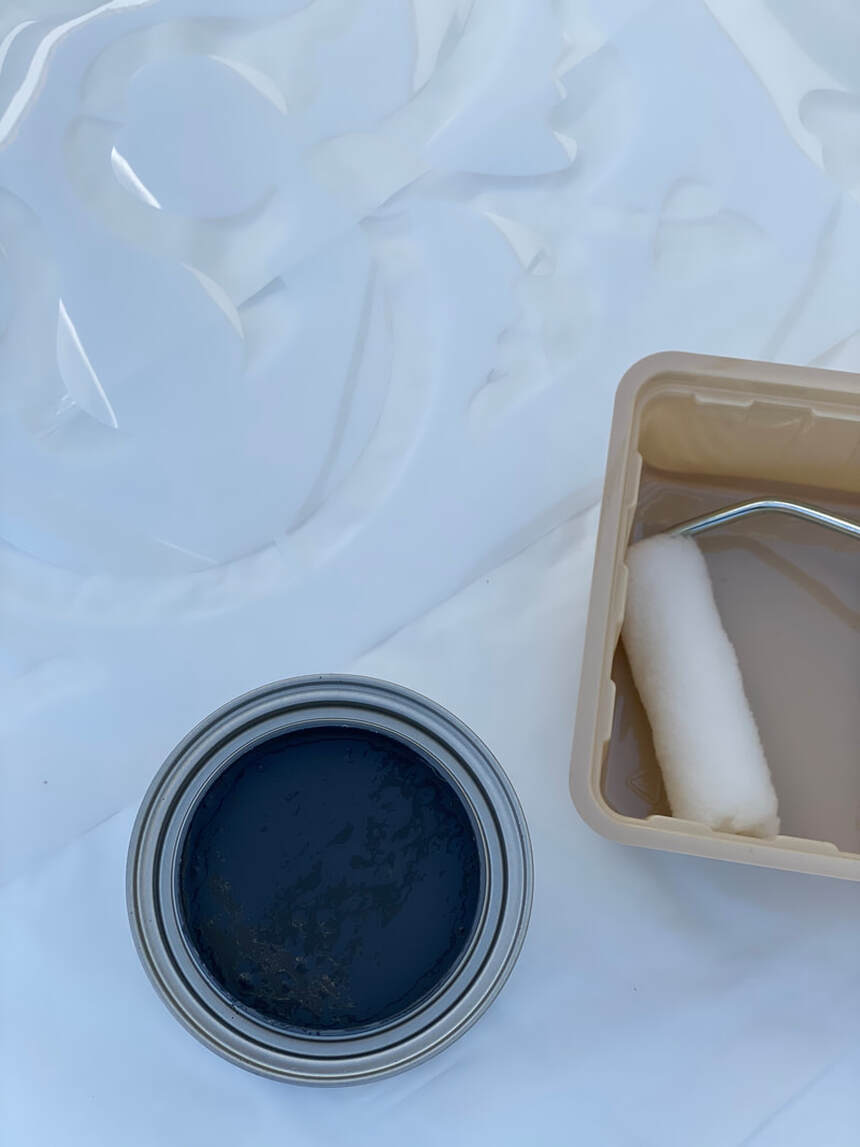 What You'll NeedStencil Concrete prep Concrete sealer Behr (or any brand) exterior paint Painting set (roller, small roller, paint pan) Paint brush extender Deck brush Tape Step 1: Prep SurfaceTo prep your surface, use a deck brush and a concrete prep solution, depending on the surface you are working on, the solution needed may vary. I used 1 part solution to 3 parts water and then let the solution sit for about 10 minutes for best results. Now it's time to brush away any old residue (dirt, rocks, etc.). Put some muscle into it to ensure a clean and smooth surface to work with! *Let the tile completely dry before moving on to step two! 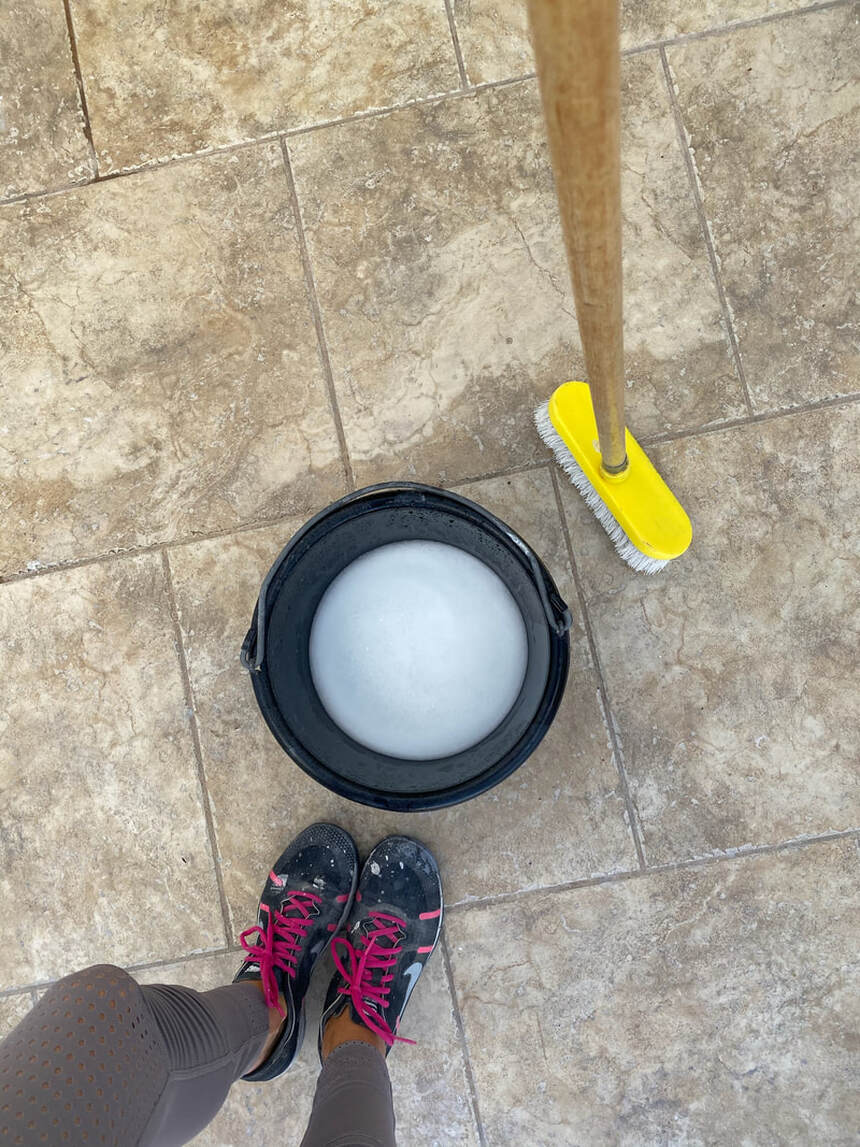 Step 2: Paint Grout LinesPaint all of the grout lines with your exterior paint using a thick paint brush to map out the squares for your template. It is easier to get the grout lines with a paintbrush than the large roller. 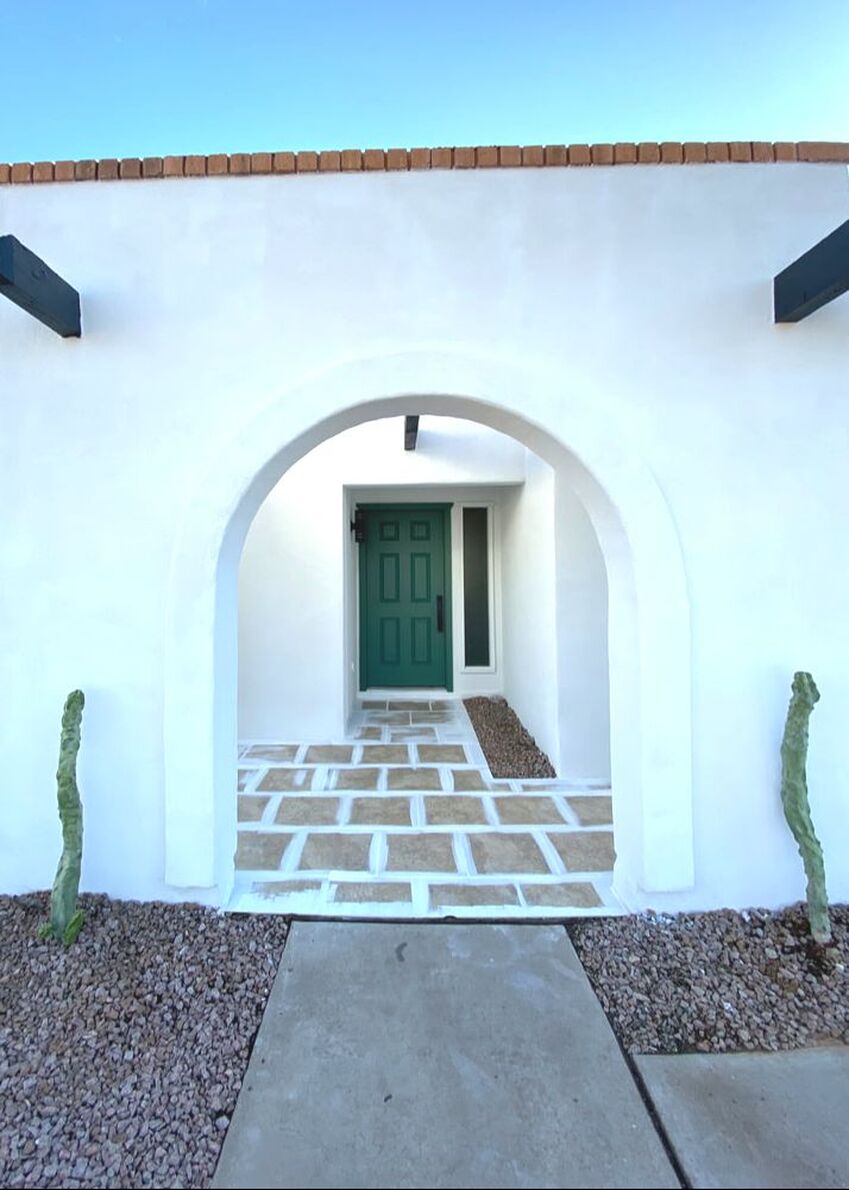 Step 3: Paint ConcreteWith your paint pan, roller, and extender, start applying the concrete paint to all of the tiles. Make sure to start from the back and move your way towards the front, this is so you don’t get stuck! Depending on your coverage, you may need to apply 2 to 3 coats to your surface letting the paint dry for about 30 minutes between each coat. *Let the final coat of paint dry for several hours or overnight before applying the stencil. 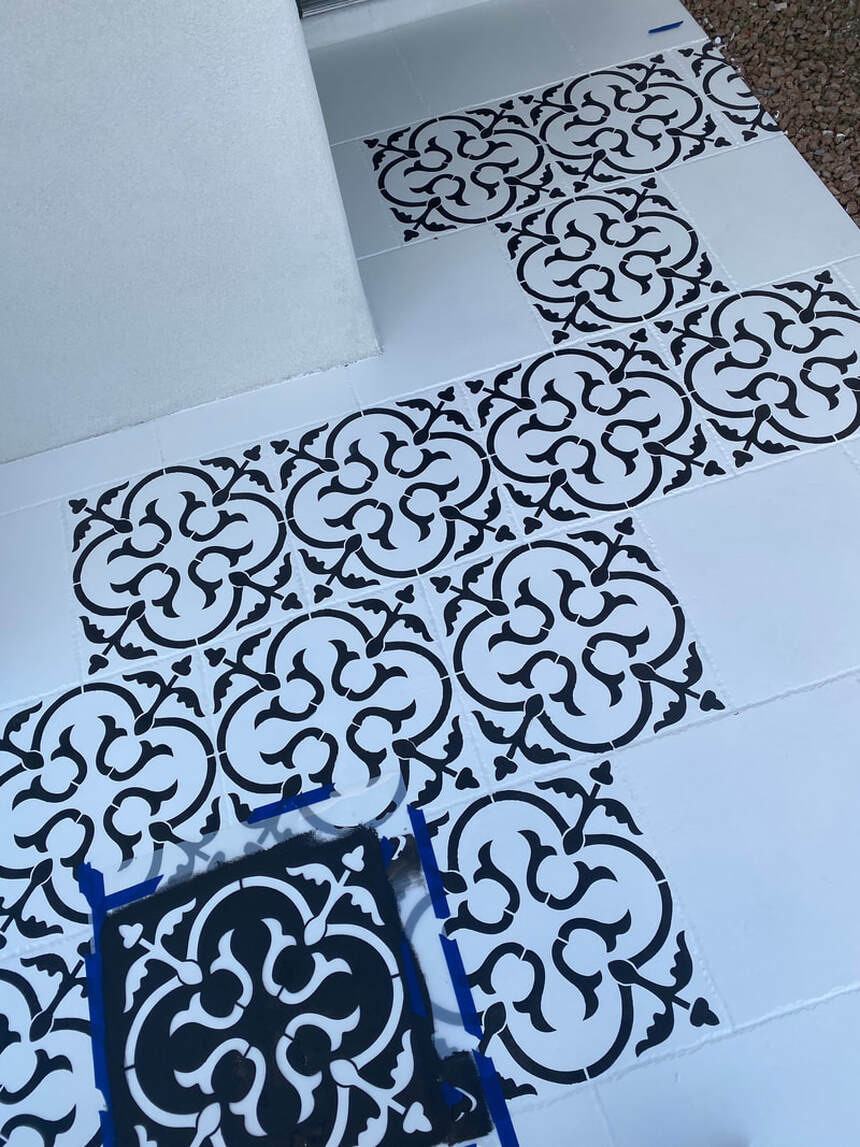 Step 4: Stencil ConcreteTape the stencil down onto one square of tile at a time, making sure the stencil is straight and centered. The key to good stenciling is applying very little paint over the stencil, this prevents the paint from seeping under the stencil and bleeding onto the tile. A small foam roller works best for this. After rolling your roller into the paint pan, be sure to roll off any excess paint onto a piece of paper before applying it to your stencil. The great thing about concrete paint is if you happen to mess up your stencil, you most likely will be able to wipe it off right away so keep a damp paper towel or cloth nearby! *Once you have completed stenciling, allow the paint to dry for several hours. Pro Tip: make sure you do not tape your stencil onto the very next tile adjacent to where you just painted, otherwise your paint may still be wet and could mess up your design! I found it helped to jump around in a pattern giving myself plenty of room while I was letting the stenciled tiles dry. 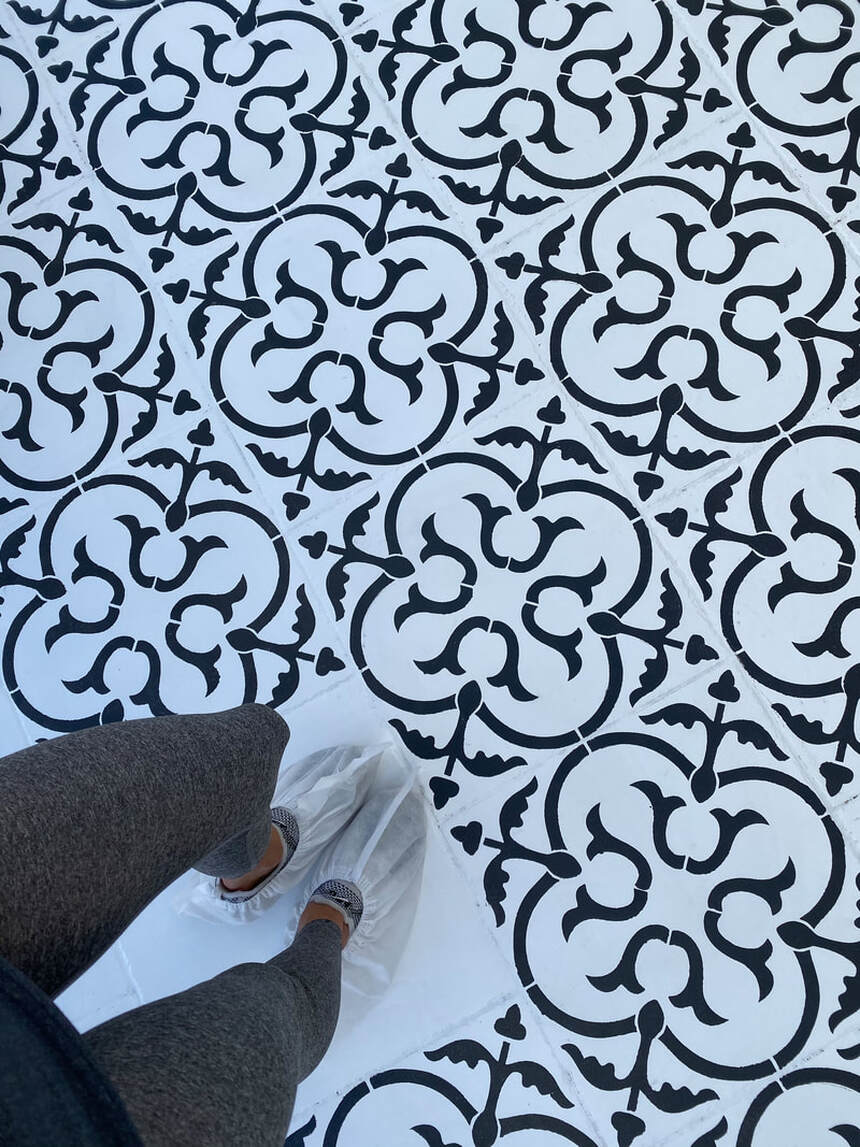 Step 5: Seal ConcreteWith a new paint pan and roller, apply the concrete sealer. This will seal in the color and eliminate chipping, peeling, and overall wear and tear. Voila! Your hard work and patience has left you with a unique and bold statement to enjoy for years on end! We hope you love your finished product and would love to see your new addition! Tag us on Instagram @beckmannhouse to share your results with us. Happy Stenciling friends!    
29 Comments
1/30/2020 03:24:16 am
This tile stencil that you made is really impressive. I am thinking of maybe making one for myself. I understand that it will take a lot before I can do it, and that is fine. The quality of the blog that you provided really makes me want to do it. I want to understand just how people do not care about these kinds of things. We need to make a conscious effort to improve ourselves, at least skills wise, man. 8/31/2020 03:31:13 am
information valuable and excellent design as share good stuff with good ideas and concepts lots of great information and inspiration both of which I need, thanks to offer such a helpful information here. <a href="https://www.devrycourses.com/product/devry-acct-444-week-3-course-project-latest/" > ACCT 444 WEEK 3 COURSE PROJECT LATEST </a> 1/24/2022 01:31:31 pm
If you properly prepare the floor to be stenciled and use the proper tools and techniques, your stenciling project should be a fun and rewarding experience. Not to mention how much money you can save with DIY stenciled floor tiles. 1/24/2022 02:21:37 pm
Our stencils for painting tiles are the perfect money-saving alternative to the pricey cement tiles. I’m so thankful for your helpful post! If you prepare the floor properly for stenciling and use the right tools and techniques, your stenciling project should be a fun and rewarding experience. Our stencils for tile painting are the best money-saving alternative to expensive cement tiles. Thank you so much for your helpful post! Needless to say, how much money you can save with DIY stencil floor tiles. 4/16/2024 11:57:58 pm
Our tile painting stencils offer the most cost-effective alternative to pricey cement tiles. Thank you for your informative post! It's clear that DIY stencil floor tiles can lead to significant savings. 5/20/2024 07:16:22 pm
This is helpful and interesting, thanks for sharing! The advice to use minimal paint on the stencil and to stagger the stenciling process to avoid smudging is particularly useful for ensuring a clean, professional finish. 6/11/2024 10:50:28 pm
This is helpful and interesting, thanks for sharing! The DIY tile stencil project adds a bold touch to any space, and the step-by-step guide makes it easy to follow. 7/3/2024 07:52:57 am
Fantastische post! Voor premium opritdiensten, bel ons! 7/5/2024 07:18:34 am
Geweldig werk! Voor opritdiensten die aan je hoge normen voldoen, aarzel niet om contact met ons op te nemen. 7/8/2024 06:58:56 am
Dit is meesterlijk vakmanschap! Voor eersteklas opritdiensten, neem contact met ons op. 7/8/2024 06:59:40 am
Je werk is echt inspirerend! Voor hoogwaardige opritdiensten kun je op ons rekenen. 7/9/2024 06:55:20 am
Ongelooflijk werk aan dit project! Je oog voor detail is inspirerend. Voor perfecte opritdiensten, neem contact met ons op! 7/10/2024 06:36:30 am
Prachtig werk! Uw oprit kan er net zo geweldig uitzien met onze deskundige diensten. 7/11/2024 07:35:26 am
Dit is precies wat ik vandaag moest lezen. Goed gedaan! En als je opritdiensten nodig hebt, neem gerust contact met ons op. 7/17/2024 06:27:58 am
Prachtige resultaten! Overweeg onze opritdiensten voor een even indrukwekkende uitstraling. 7/17/2024 06:28:20 am
Fantastische afwerking! Wij kunnen hetzelfde doen voor uw oprit. 7/19/2024 10:00:43 pm
Indrukwekkend! Laat ons dezelfde kwaliteit naar uw oprit brengen. 7/22/2024 06:48:49 am
Perfectie! Wij kunnen uw oprit ook perfect maken. 7/22/2024 06:50:07 am
Ongelooflijk vakmanschap! Overweeg onze diensten voor uw oprit. 7/24/2024 10:23:36 pm
Dank je wel voor deze inspirerende DIY tegelstencilproject! Als je een oprit nodig hebt, bezoek dan gerust onze website. 7/24/2024 10:24:15 pm
Geweldig om te zien hoe deze stencils de entree een mooie uitstraling geven! Voor opritdiensten, kijk gerust op onze site. 7/24/2024 10:24:51 pm
Bedankt voor het delen van dit gedurfde project! Als je ooit opritdiensten nodig hebt, bezoek dan onze website. 7/24/2024 10:25:24 pm
Wat een fantastisch resultaat met deze DIY stencils! Vergeet niet onze site te bezoeken als je opritdiensten nodig hebt. 7/25/2024 10:50:14 pm
Geweldige inspiratie! Dank je voor deze prachtige DIY tegelstencil-project. Het resultaat ziet er fantastisch uit en geeft de entree echt de nodige flair. Als je ooit een opritdienst nodig hebt, bezoek dan gerust onze website! 7/25/2024 10:51:06 pm
Wat een mooi project! De levendige kleuren geven echt een unieke uitstraling. Bedankt voor het delen van deze stappen. Mocht je een opritdienst nodig hebben, neem dan een kijkje op onze site! Leave a Reply. |
Categories
Archives
November 2020
|

 RSS Feed