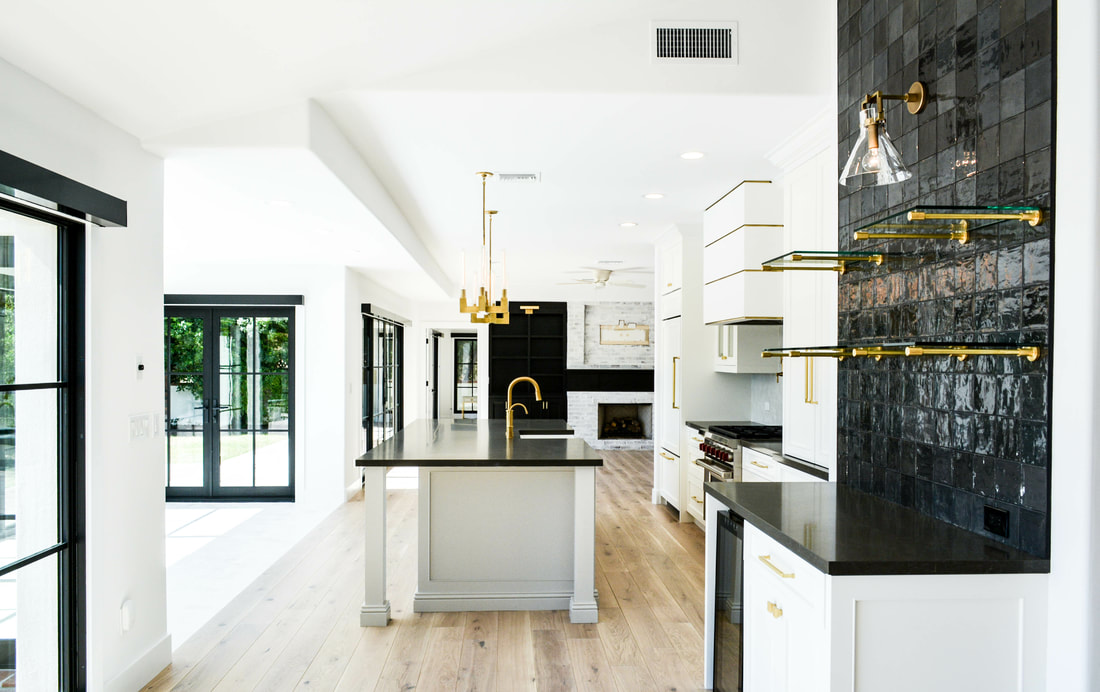
When you think of the color white, you might not realize just how many shades of white paint there are to choose from. Let me be the one to tell you there are hundreds of different shades of white. This has to do with the undertones. Just like any other color, white also has undertones that will affect it's color. After trying out a number of different shades of white in our own remodels, we have decided to share our tried and true favorites with you! 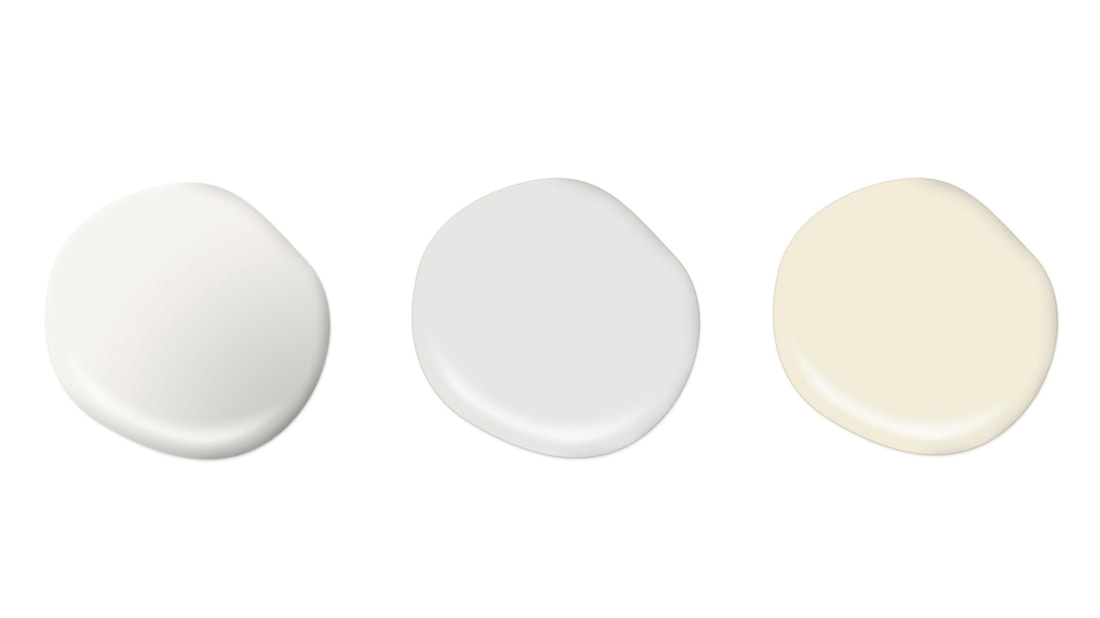 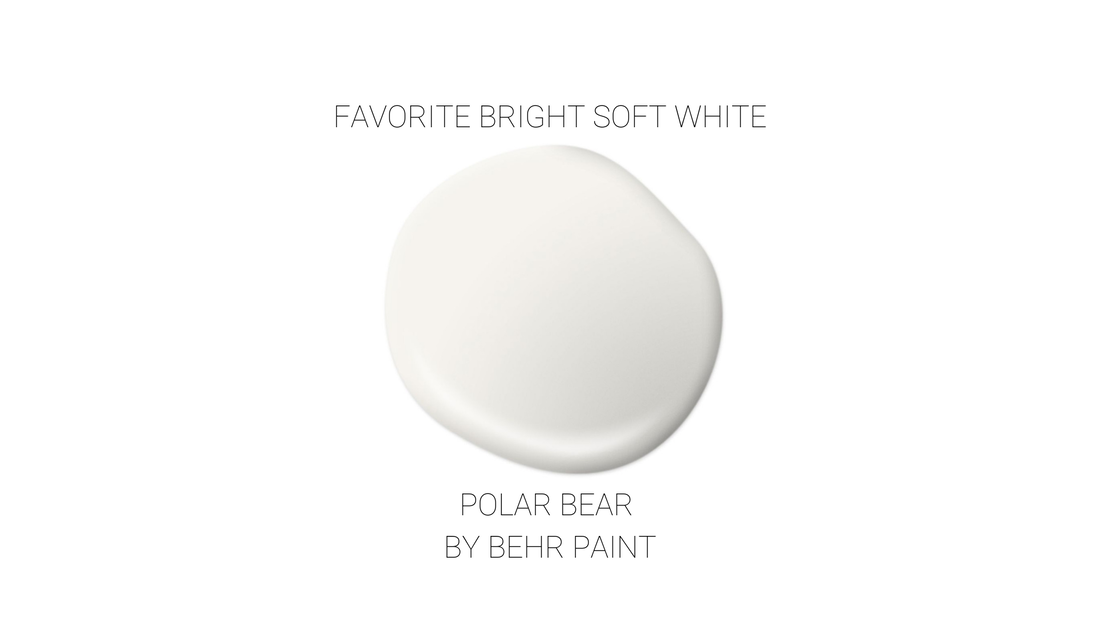 As seen throughout the interior of our Kings Ave Remodel, Polar Bear by Behr is the perfect blend of soft yet bright white. This is a really nice go-to white when you are looking for a true white color on your walls without a super stark white appearance. I would recommend this white for any size room or design style of a home!  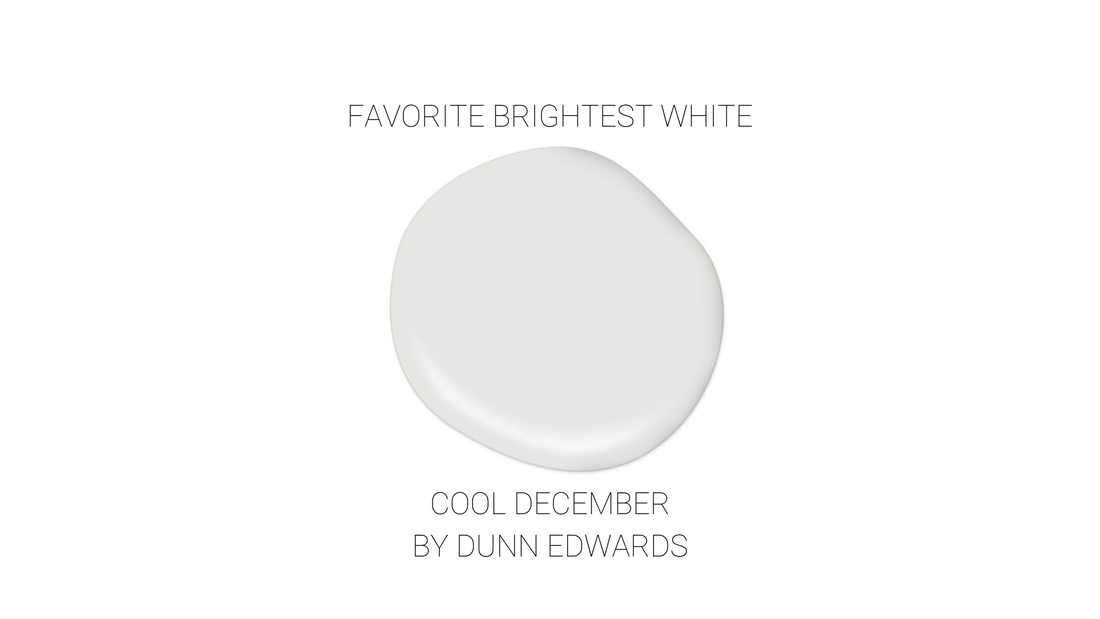 In the Modern French Remodel, we wanted a true bright white interior for this modern style remodel. Cool December by Dunn Edwards was our favorite bright white after testing out a number of close seconds. This was used thought the interior of the home and looks beautiful with all of the natural light that floods inside. The smooth textured walls contribute to the clean aesthetic we were looking to achieve while the stark white color brings in the modern flare.  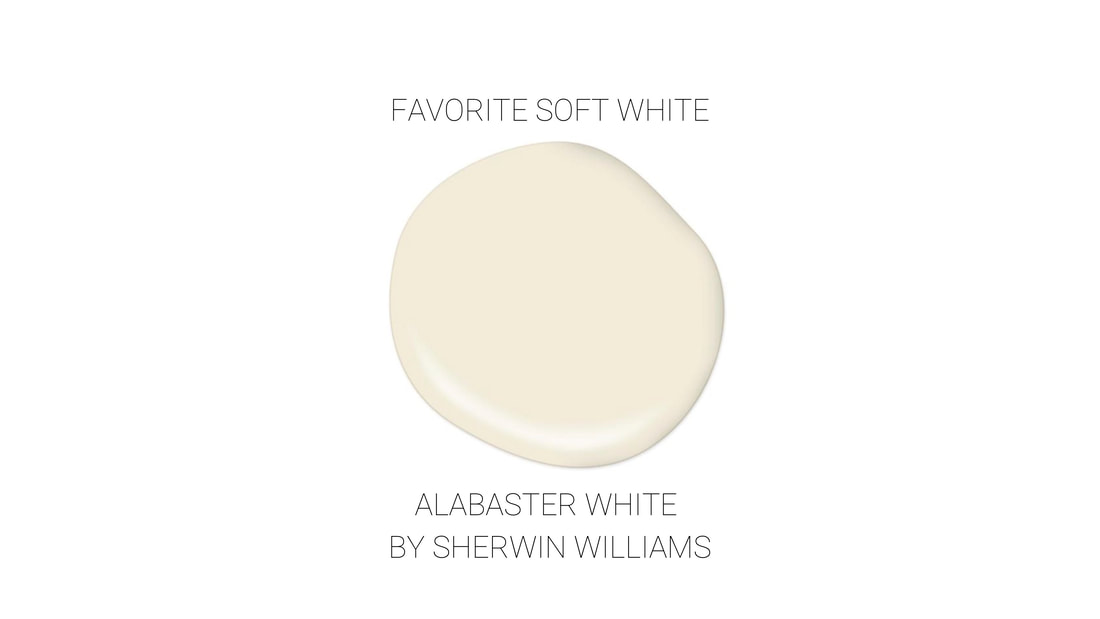 Oh, Alabaster! We have used this in many of our remodels for both interior and exterior paint. This was most recently featured on the exterior walls at our Kings Ave Remodel as well as the interior and exterior walls at our Coolidge Remodel. This is also a client favorite! This white is great because it has a soft undertone without taking on a yellow appearance. For an exterior color, this is best paired with a dark trim to make the white appear whiter. In both cases, when we applied it on the exterior of the home, we used Tricorn Black by Sherwin Williams for the Trim. I would recommend Alabaster to anyone who is looking for a soft white for their home.    In a world full of whites and greys, we tend to forget about old friends and variations of these key colors. Anything that is not light and bright has gotten the boot lately, but what about those lovely soft taupes we all used to fawn over?! It's time to bring taupe (with a modern touch) back into your life! Taupes look absolutely fantastic in a wide range of settings, and compliment whites, greys, and beiges so well you will wonder why you ever got rid of these staples. Take a look at some of our favorite modern taupes below! 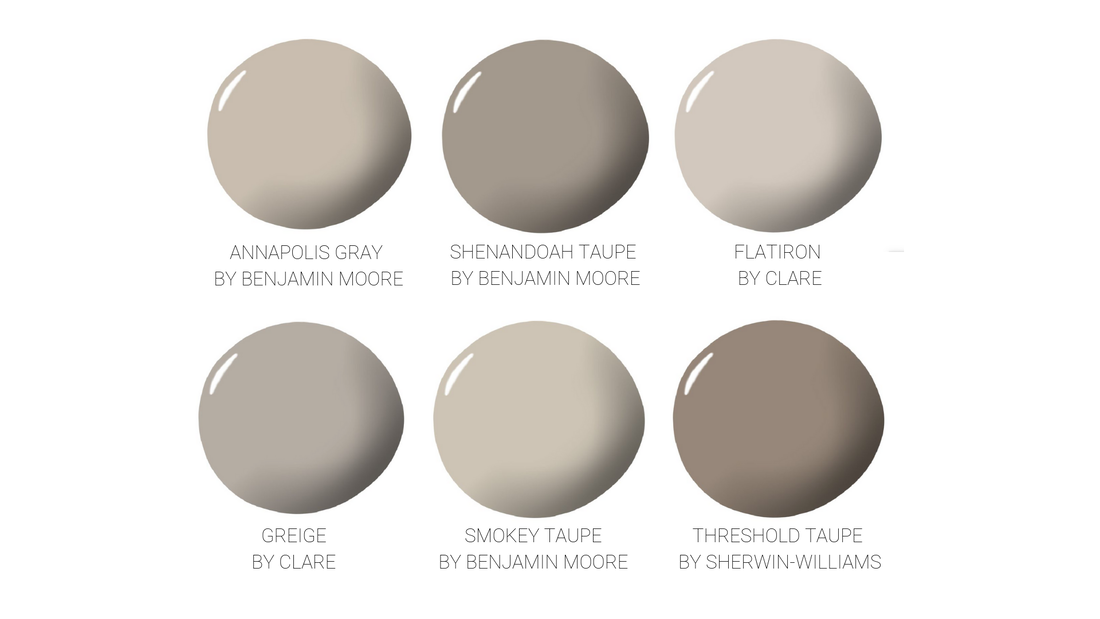  
13 Comments
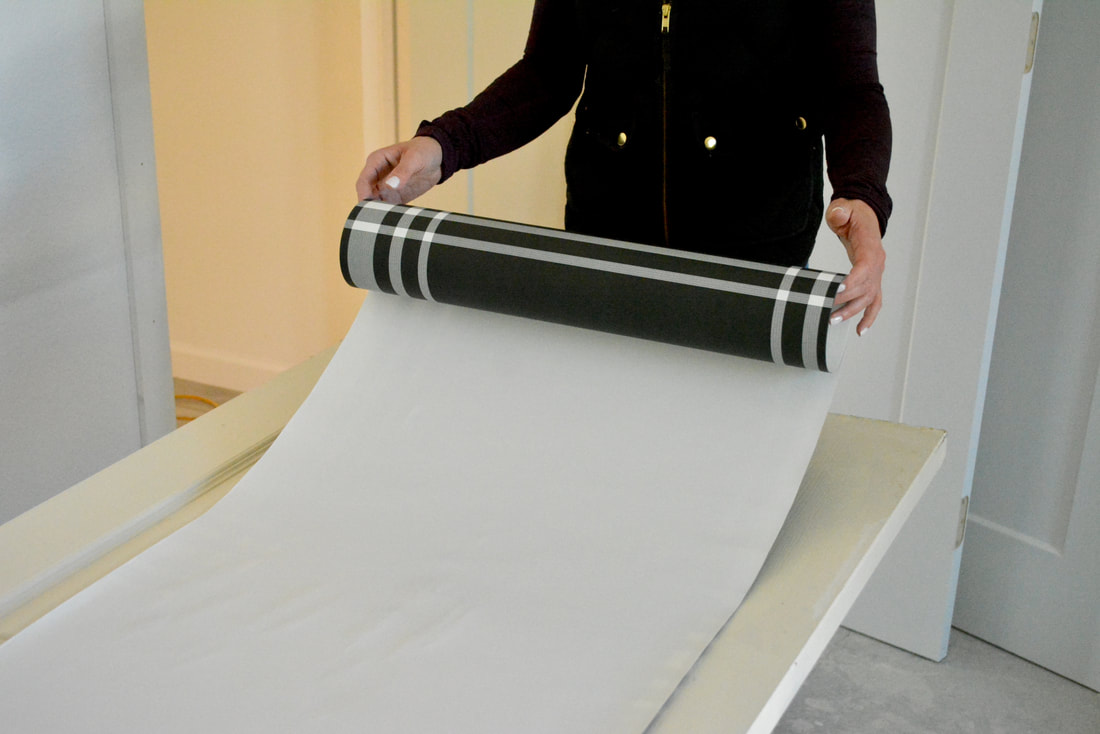
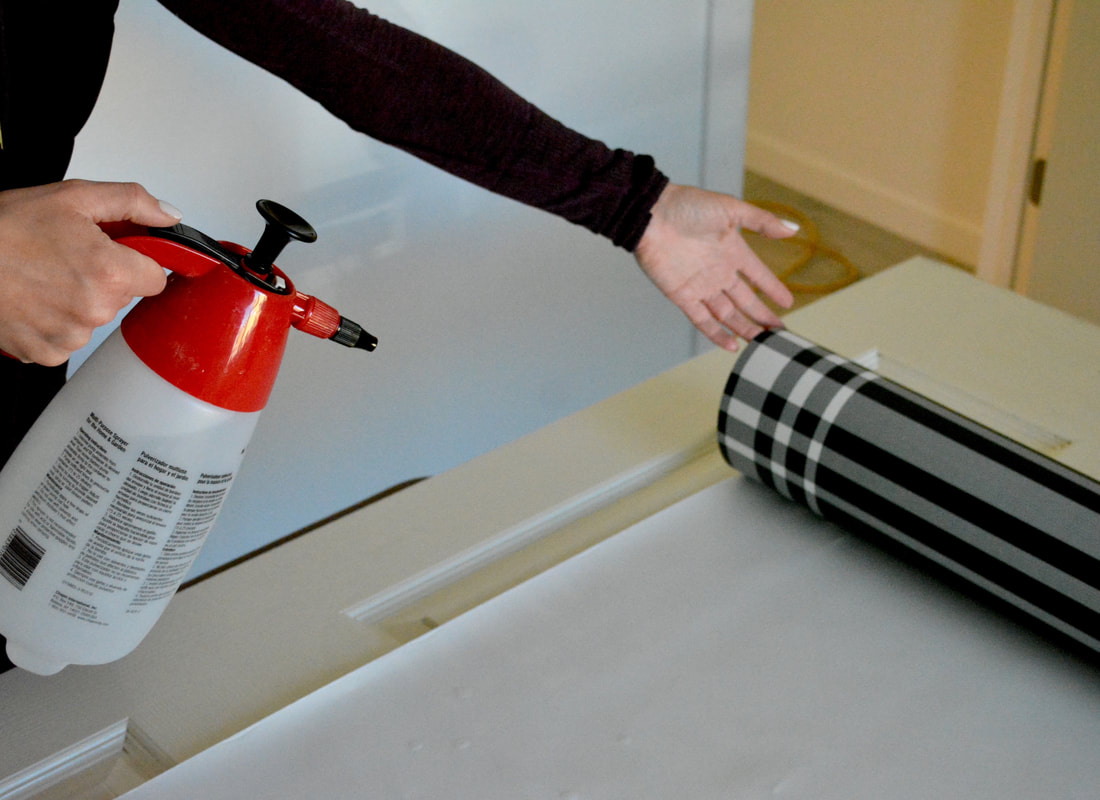
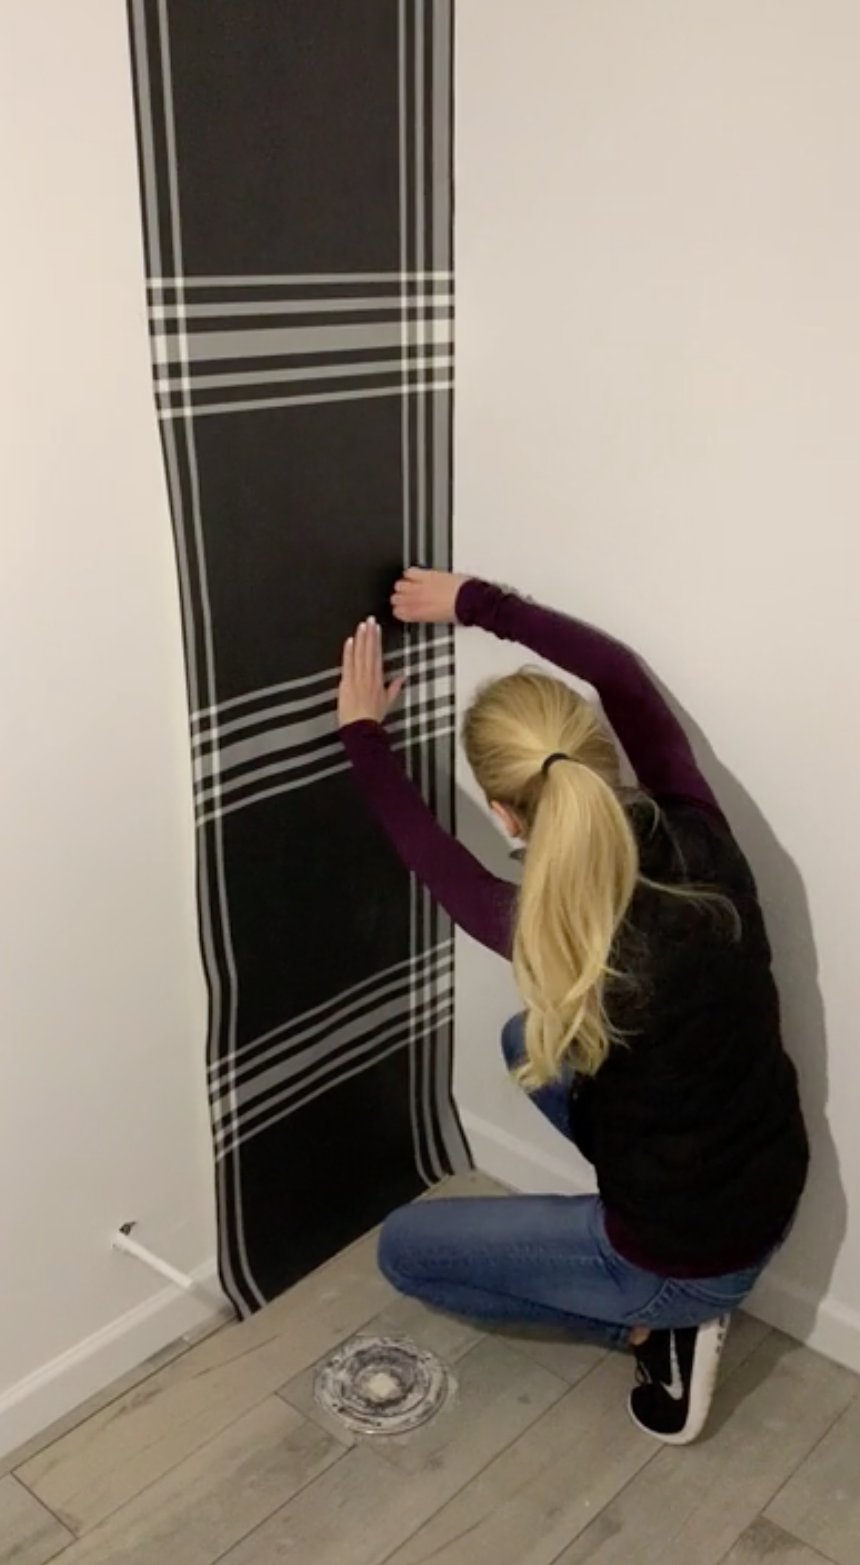
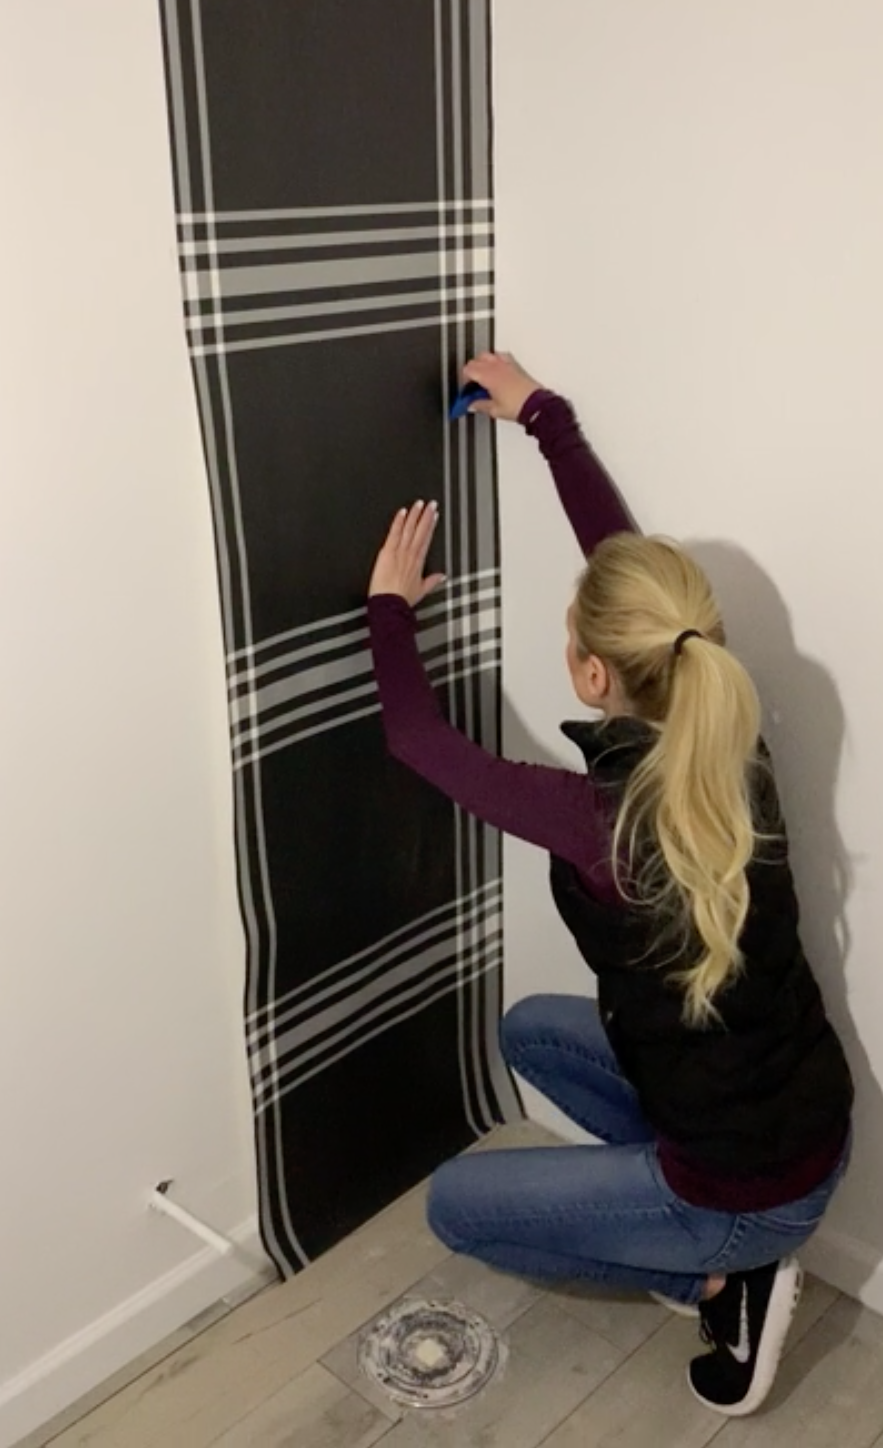
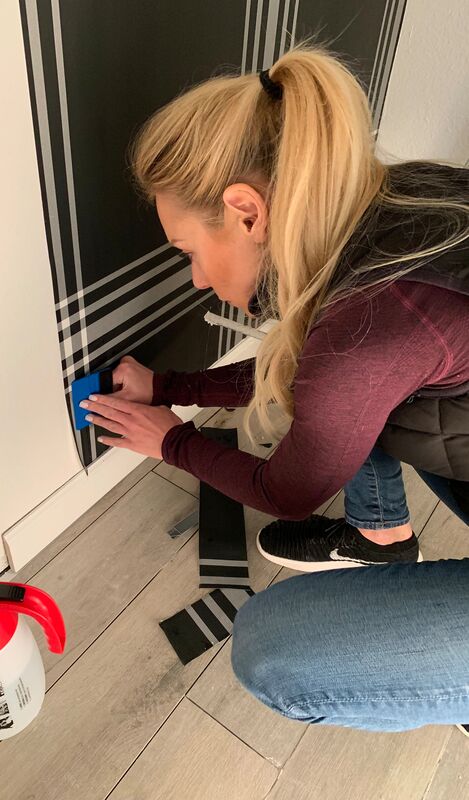
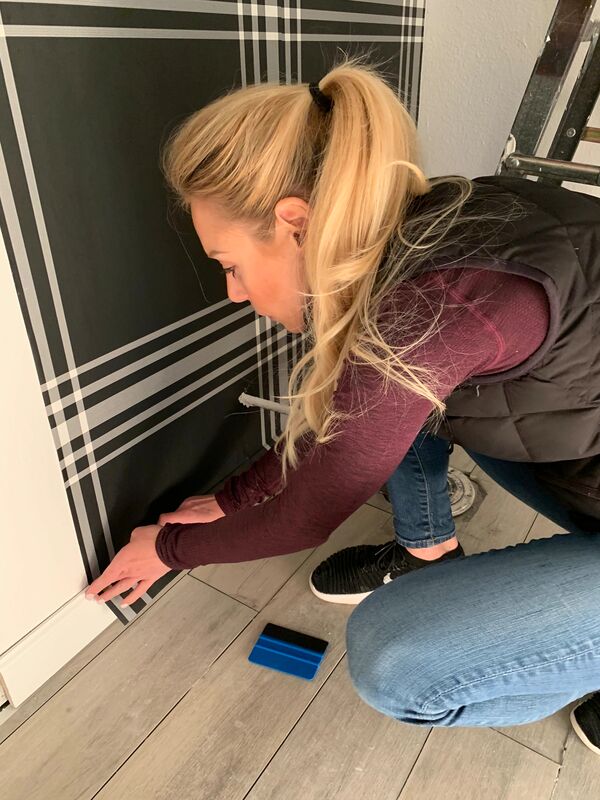
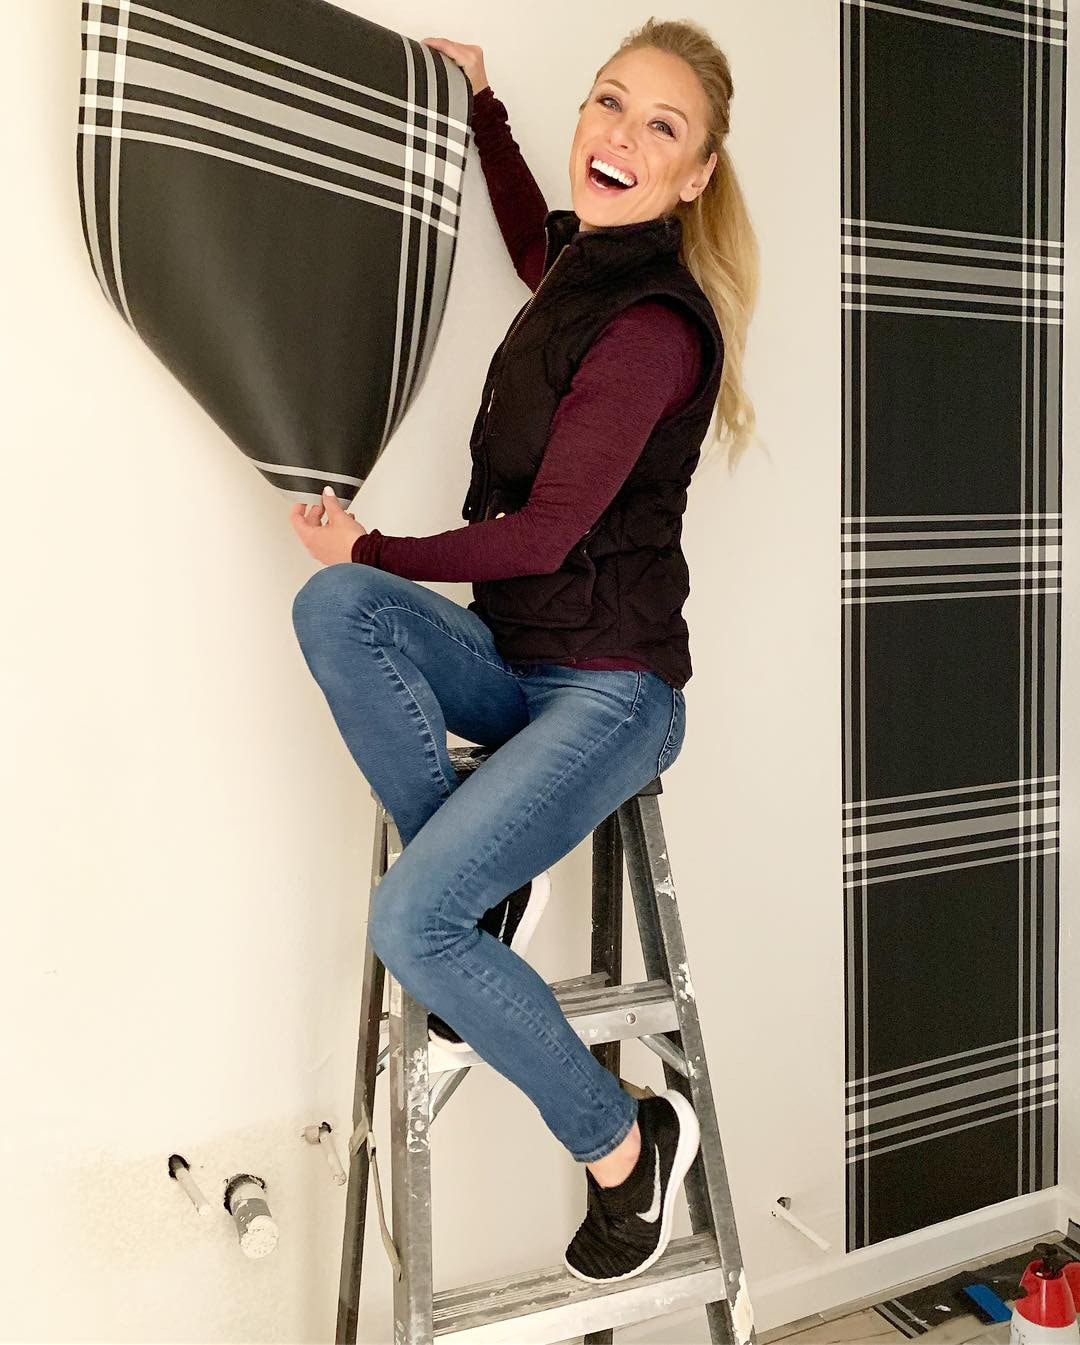
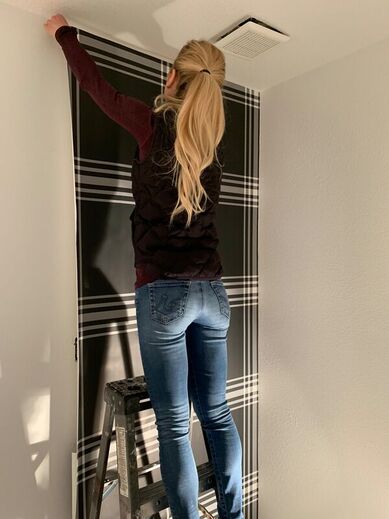
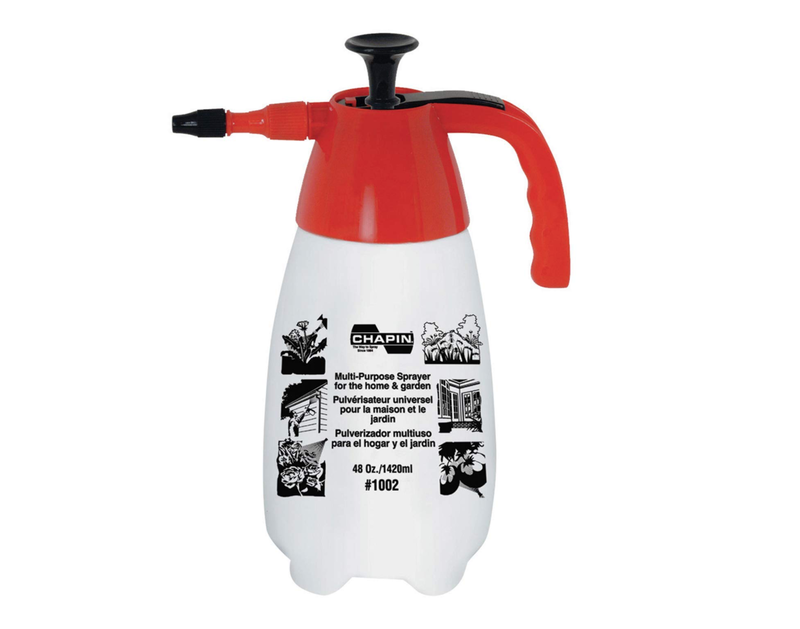
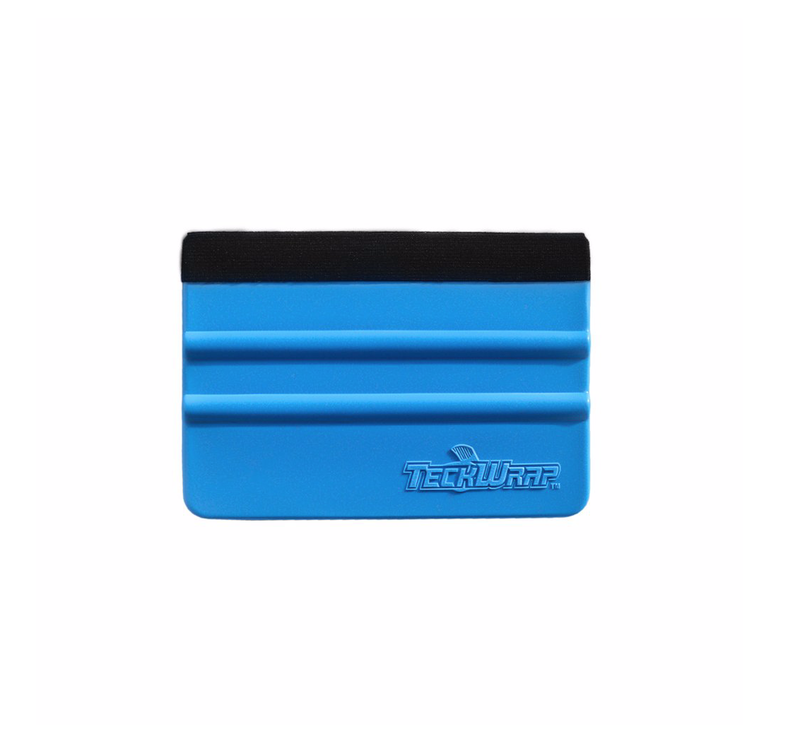
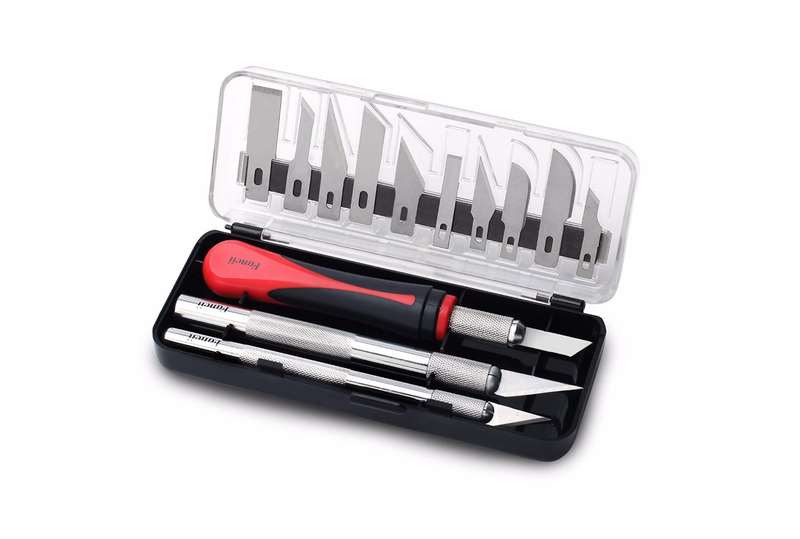
  One of my favorite ways to give a little personality to a room is to add wallpaper! Whether you are choosing a bold print, or a simple pattern, wallpaper is a great addition to any room. Installing wallpaper yourself may seem a little scary at first, but follow along as we break this DIY down step by step to give you the confidence you need to transform your space! 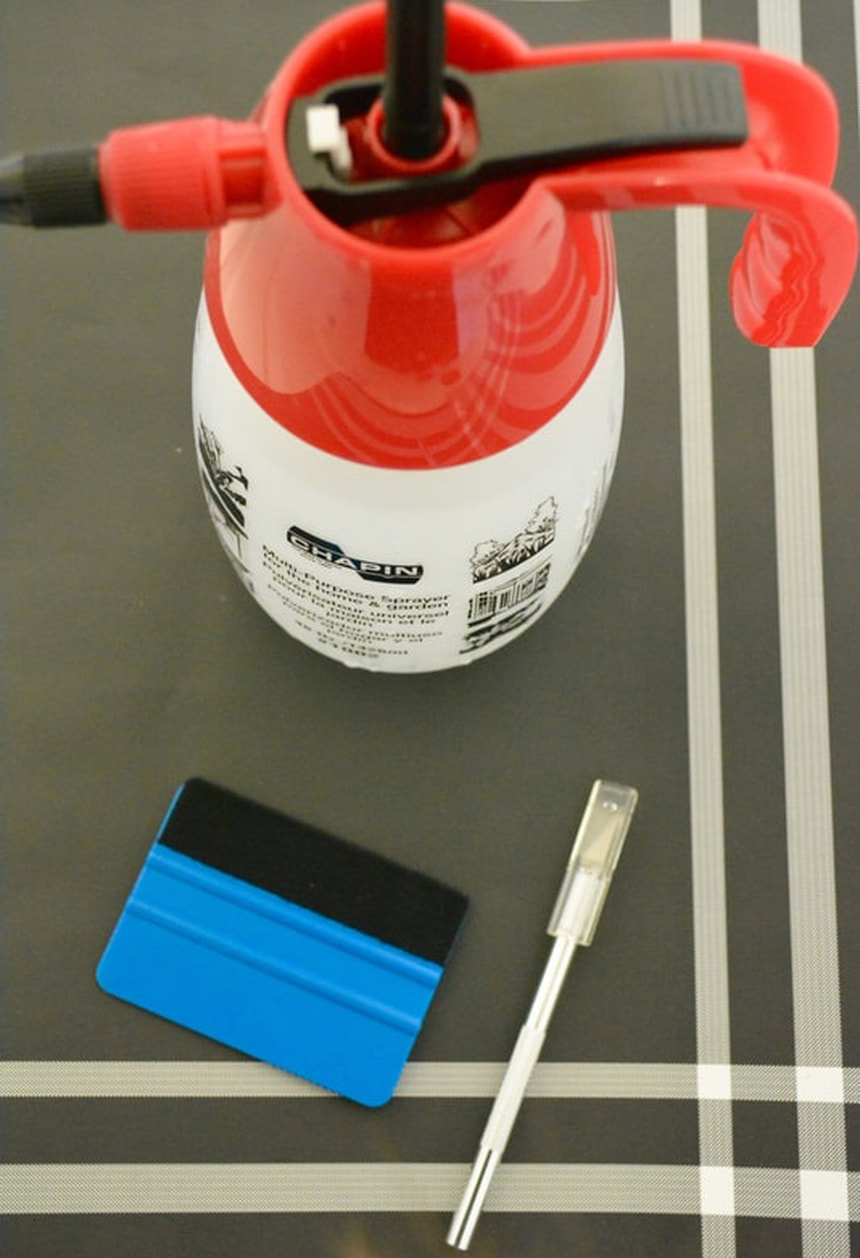 What You'll Need:Step 1: Measure Your SpaceFirst, measure out the wall or walls that you are wanting to be covered with wallpaper. You will then measure your wallpaper and cut to the size you need. Tip: Leave 1-2 extra inches on the top and bottom of each panel, just in case! You can always trim later. Step 2: Spray With Water To Activate AdhesiveAfter measuring and cutting your rolls of paper, roll your wallpaper out onto a smooth, flat surface and flip over, adhesive side up. You will then want to use your spray bottle to generously spray the backside of your wallpaper, making sure to get a nice even coat over the entire panel. Don't forget the edges and corners! Step 3: BookingNext, you are going to carefully fold in the top and bottom of your wallpaper panel to meet in the middle, this is called booking! Booking allows the paper to relax a little bit before application, but only if the paper is loosely set on top of each other. Be careful not to mash it down on the paper underneath, we just want to softly set it on top of the later underneath. Your paper should be smooth with no harsh bends or wrinkles in it. You are going to let your wallpaper sit in this position for about 3 minutes, then you are ready for step four! 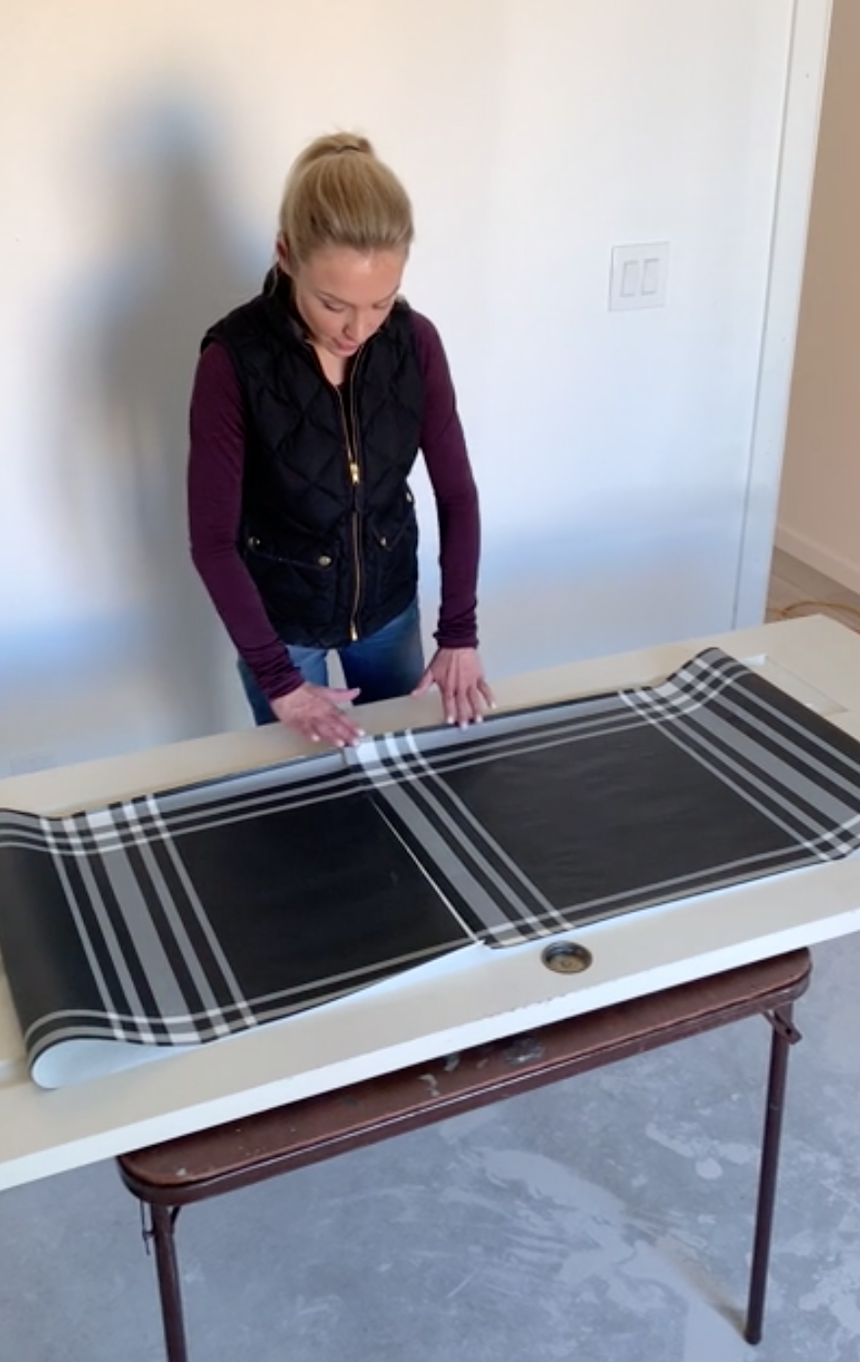 Step 4: First Panel InstallationThe first panel of wallpaper sets the tone for the following panels so the pressure is on! Unfold your wallpaper from the previous step and carefully bring your panel, adhesive side up into the wallpapers new room. Pick a corner of the room to start in and grab your ladder for installation. Tip: This process is easiest with two people, have your helper stand back and make sure that the panel looks straight and is perfectly in the seam between the wall and the ceiling as well as the seam between the wall you are applying the paper to, and the wall next to it. It is important that you adhere your paper to the wall slowly and carefully so that your panel is straight and positioned correctly. Once you press the top of your wallpaper onto the wall and into the seams, you may be able to remove it or adjust it once or twice, but will lose adhesive after that. Take your wallpaper smoothing tool and use your other hand to press the wallpaper into the seam where the two walls meet. You are really going to have to make sure that the edges are smoothed out and sticking to the wall. If your edges or any of your paper is losing some of its' adhesive, not to worry, just carefully peel the area back from the wall and use your spray bottle to spray a little bit more water onto the back of the wallpaper, and voila! 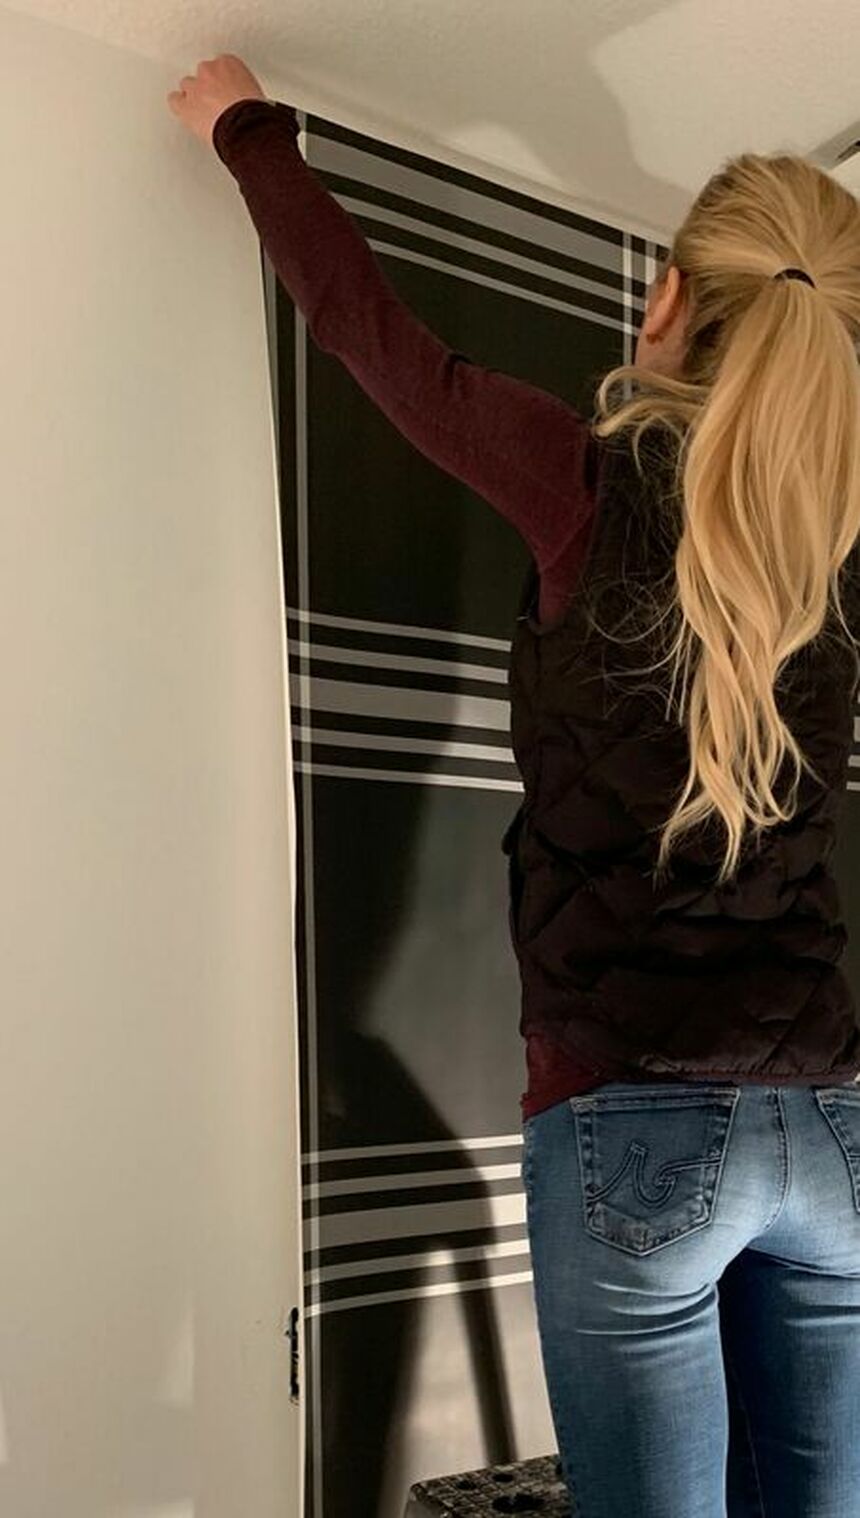 Step 5: Smooth Out All Air BubblesOnce your wallpaper is in place and adhered to the wall, use your wallpaper smoothing tool again and get out all of the air bubbles in the paper. Start from the top of your panel and work your way down, scraping out the air bubbles toward the side of the wallpaper where your second wallpaper panel will be installed. Step 6: Trim Excess PaperIf you left a couple of inches at the top and bottom of your panel, it's time to trim those back! Using your wallpaper smoothing tool, make sure you press the bottom of the wallpaper into the baseboard or seam to give yourself a nice crisp seam to cut into. Use your exacto knife or box cutter for a straight line and a precise cut. Cut along the seam, crown molding, or baseboard, making sure you are going slow, it is hard to undo any mistakes during this step.  Step 7: Additional Panel InstallationOnce you are happy with your first wallpaper panel, it is time to start your next one! Some wallpapers have linear patterns that are easy to line up, not all are this simple but try to match up any patterns you have as best you can! When you lay panel number two next to panel number one, try to lay the paper as close to each other as possible without overlapping the paper, make sure you do not overlap the wallpaper panels! Once your panel is straight and lined up with the panel next to it, press the top of your wallpaper into the crease with your smoothing tool between the ceiling and wall as you did before. You will now repeat the previous six steps.
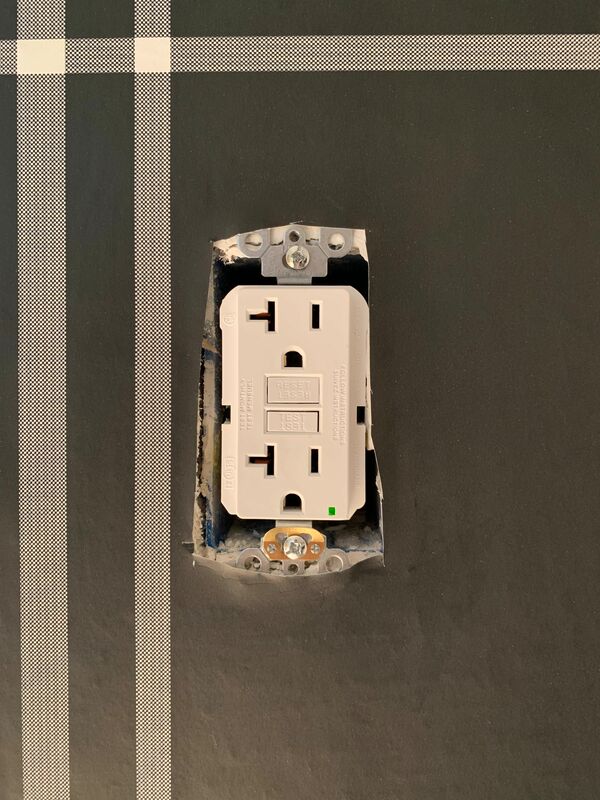
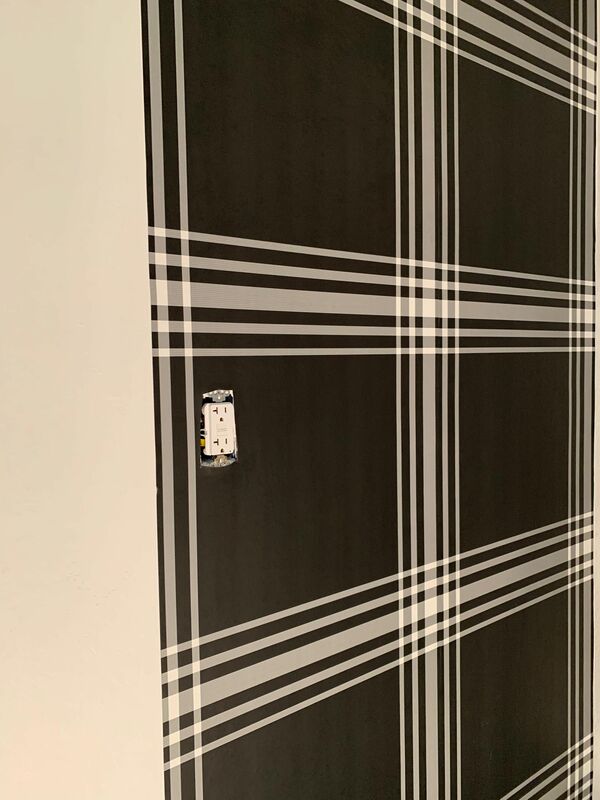
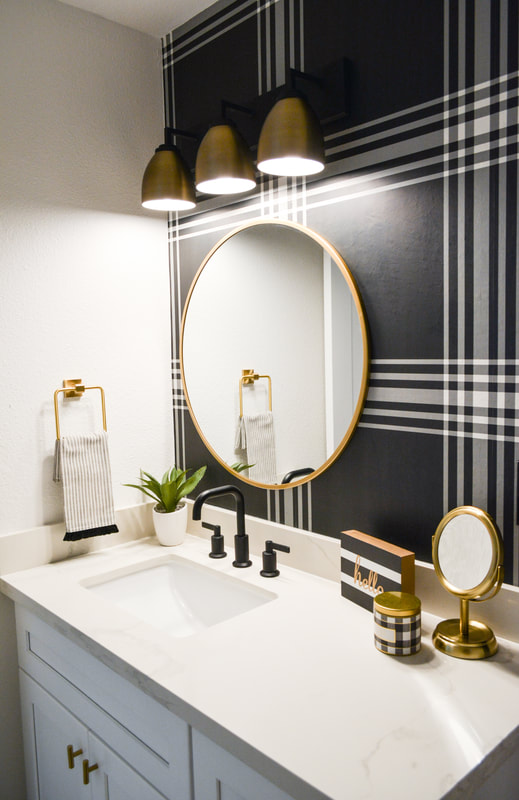
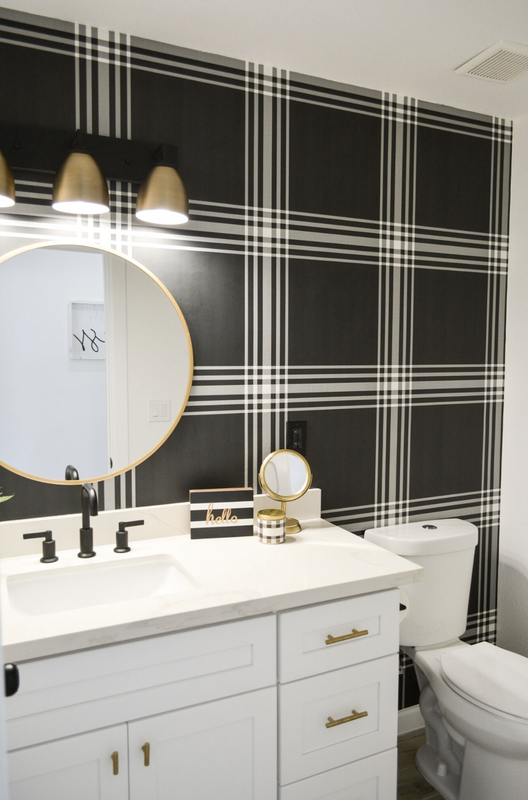
Step 8: Cut Around Any Outlets Or SwitchesIf you have any electrical outlets, switches, or plumbing that you need to cut out or around, do so before completing the panel it will be in. If there is a faceplate on the outlet or switch, take that off before beginning to cut. Find some sharp, non bulky scissors, a box cutter, or an exacto knife and poke a small hole where the corner of the area is. Carefully cut around the area but also remember that these areas will most likely be covered by face plates (for a switch or outlet) or a toilet (plumbing), so if you mess up, fortunately it won't be very noticeable! 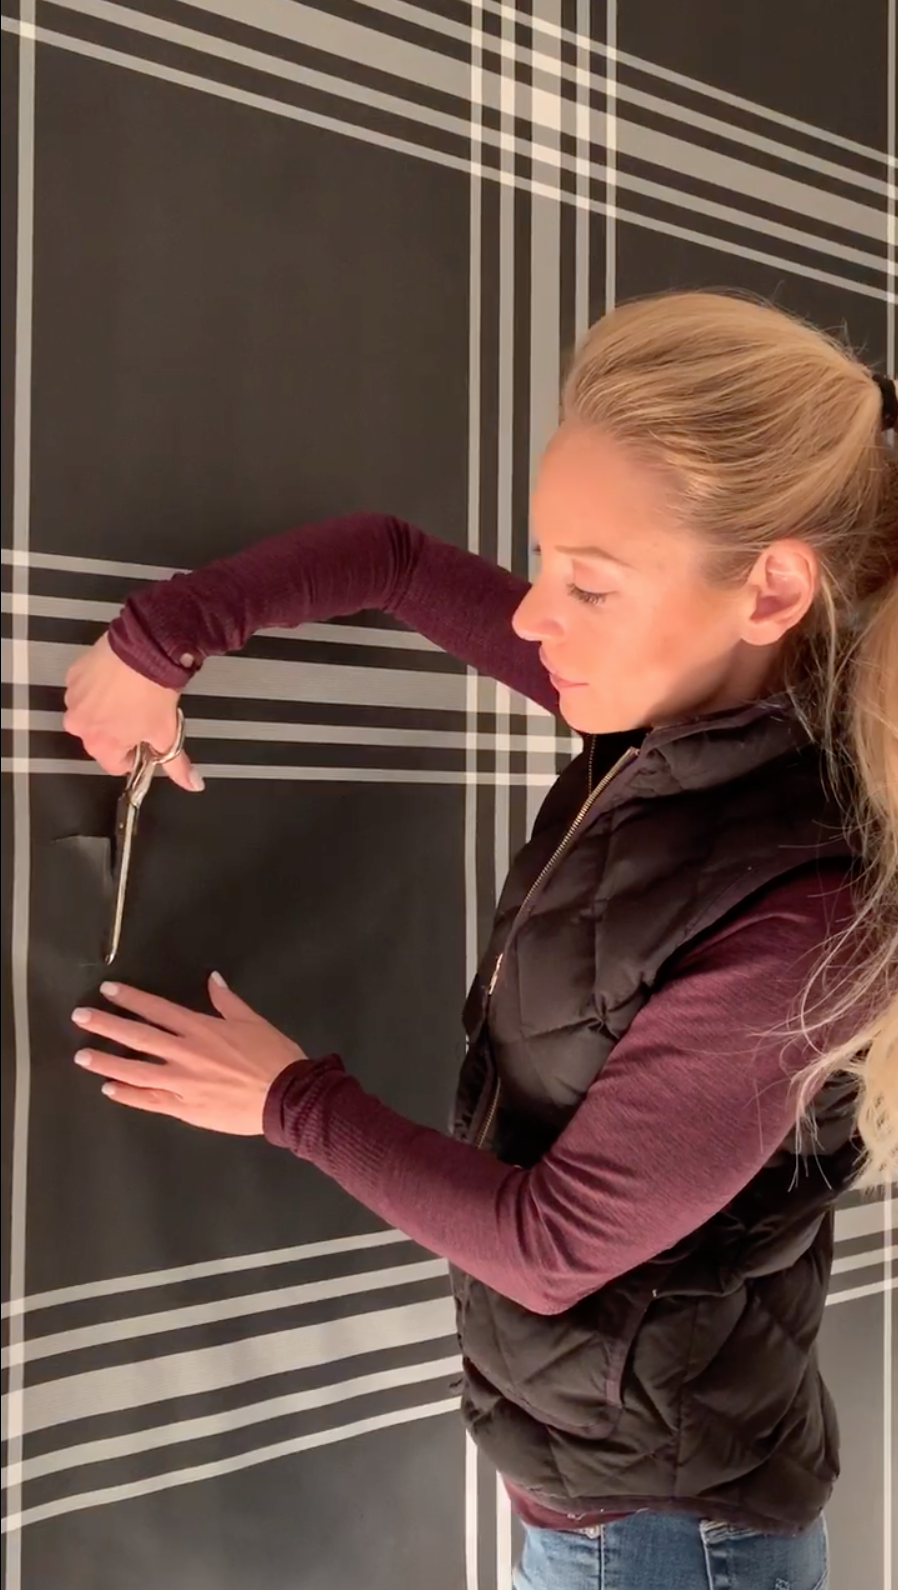 Step 9: Stage Your New RoomI love staging with pieces that complement and make sense in the space. Fun hand towels, candles and plants are some of my go to pieces for bathrooms. Most importantly, if you like it, you should use it!    |
Categories
Archives
November 2020
|
 RSS Feed